












Content Templates
Salesforce Classic 101 Training Template
Customize this training to give your sales team the help they need directly in Salesforce to maximize sales rep productivity and pipeline.

Salesforce Classic refers to the original user interface and user experience of the Salesforce customer relationship management (CRM) platform. It was the initial version of Salesforce’s interface and was widely used before Salesforce introduced the Lightning Experience.
Salesforce Classic provides various tools and features for managing customer relationships, tracking sales leads, managing accounts and contacts, and automating business processes. It offers a range of customization options, such as creating custom objects, fields, and workflows, to tailor the platform to specific business needs.
If your team uses Salesforce Classic, learn how you can customize the following training template to meet your unique business needs and surface this training directly within your instance using Spekit.
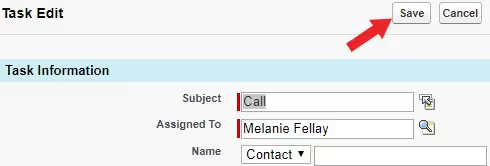
You can log a call by going into the specific record.
Business Process
1. Select a specific Lead, Account, Contact or Opportunity for which you want to Log a Call.
2. In the Activity History click Log a Call.

3. Fill in the required information and click Save.
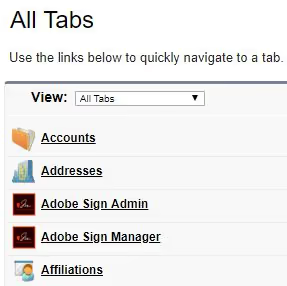
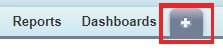
On the Home page of your Salesforce, click on the + button to the far right of the page along with the other tabs.

All the tabs available to you will appear on this page
Business Process
On the Home page of your Salesforce, click on the + button to the far right of the page along with the other tabs.
All the tabs available to you will appear on this page
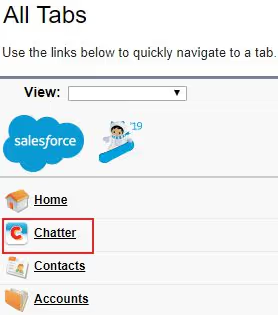
Click on the Chatter tab in your salesforce as shown below. You will find this with all other Navigation Items at the top of your Salesforce page.

OR
If you don’t see the Chatter tab, click on All Tabs (+) to access all tabs in your Salesforce and search for Chatter.
Click on Chatter and you’re good to go.
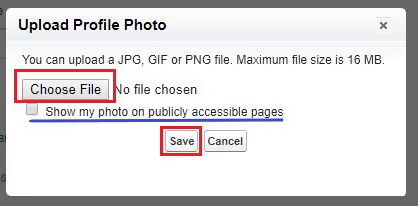
Adding a profile picture to your profile is one of the first things you would do when setting up your Salesforce account. Adding a profile picture allows others to identify you easily.
Business Process
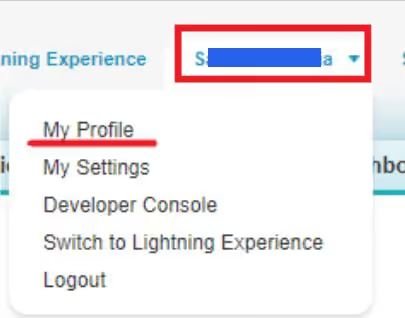
1. Click on your name and select My Profile.
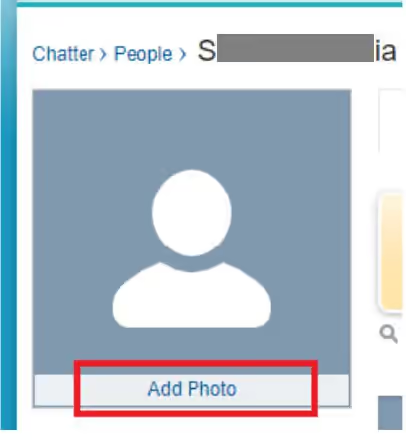
2. Click on Add Photo.
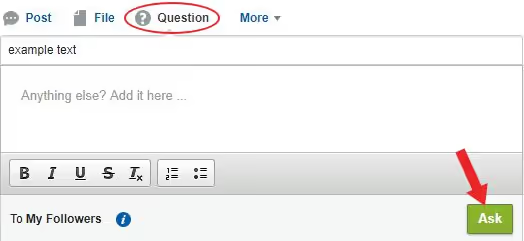
Here’s how you can ask a Question in Chatter in Salesforce Lightning.
Business Process
1. Click on the Chatter tab in Salesforce.
2. Click the Questions tab. Enter the question you want to post in the Question box and any description or details about your question in the Details box. Click Ask.
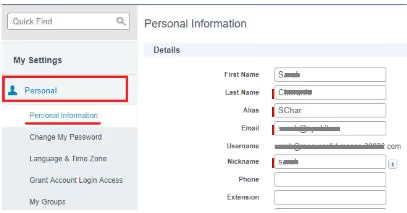
Personal Settings include the users personal information such as Name, Password, Contact Information, Designation and more.
Business Process
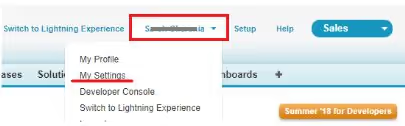
1. To Access personal settings click on your Name, and then select My Settings.
2. Now click on Personal and from the drop down menu choose a field you would like to edit such as Personal Information and click Save.
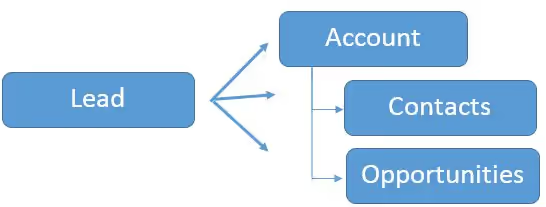
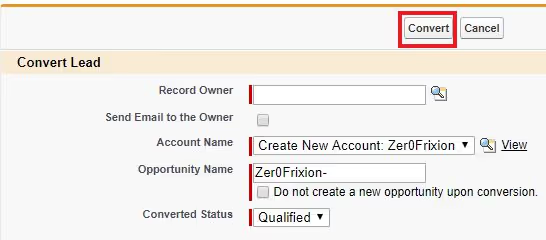
Each lead conversion in Salesforce creates an Account, Contact and an Opportunity as shown below:
Business Process
1. Click on the Leads tab at the top of your Salesforce page.

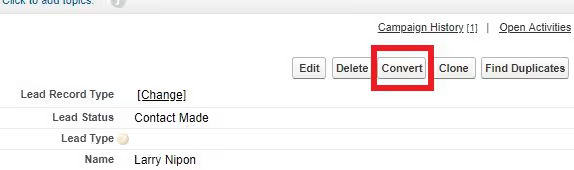
2. Select a Lead you want to convert. Now click on the Convert button.
Account Contact Roles allow users to associate any contact to an account, even those with a different parent account. Its only function is to allow the user to designate a role for that contact at the selected account.
Business Process
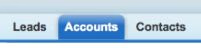
1. Click on the Accounts tab in Salesforce and select the account you want to add the Contact Role to.
2. Scroll down to Contact Roles and click New.

3. Fill in all details available and click Save.
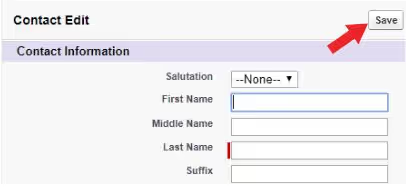
The Opportunity Contact Role option must be enabled in your org by the admin through setup, and will appear in the related lists quick links.
Business Process
1. Click on the Opportunities tab in Salesforce and select the specific Opportunity which you want to add a Contact Role to.
2. In the Related Lists, click New in Contact Roles.
3. Add the Contacts and their respective Roles. You can add multiple contacts. Now click Save.
A Campaign is an outbound marketing project that you want to plan, manage, and track within Salesforce. It can be a direct mail, advertisement, conference or other type of marketing initiative that you conduct in order to generate prospects and build brand awareness.
Business Process
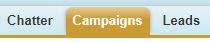
1, Click on the Campaigns tab in your Salesforce.
2. Click on New,
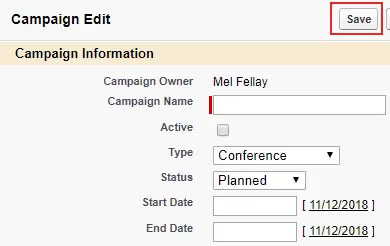
3. Fill in the required fields and any other information you have. Now click Save.
1. Click on the Contacts tab at the top of your Salesforce page.

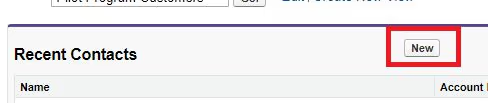
2. Click New.
3. Fill in the required information and click Save.
Dashboards are a graphical representation of data such as pie charts and bar graphs.
Click here for more information on Salesforce dashboards.
Business Process
1. Click on the Dashboards tab in Salesforce.
2. Click on New Dashboard.

3. Add one or multiple components to the dashboard you are creating. Once you’ve done this click Save.
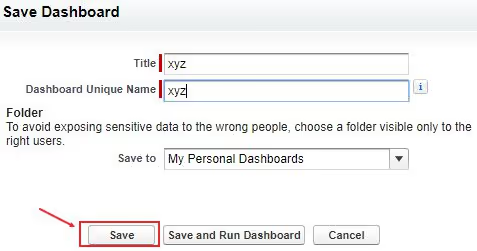
4. Give the dashboard a Name and choose which folder you want to save it in. Now click Save.
Leads are people and companies that you’ve identified as potential customers.
Business Process
1. Click on the Leads tab at the top of your Salesforce page.
2. Click New.
3. Enter the required information and click Save.
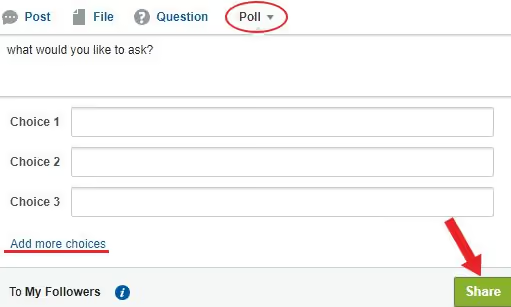
These steps will show you how to create and take a Poll in Chatter.
Business Process
1. Click on the Chatter tab at the top of your Salesforce page.
2. Click on the Poll tab. In the question field, enter the text, followed by the options to your question in the choice field. Click on add more choices to add more options. To publish your poll click Share.
1. Click on the Accounts tab at the top of your Salesforce.
2. Click New.
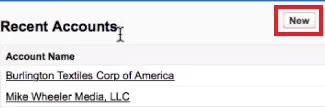
3.Fill in the required information and click Save.
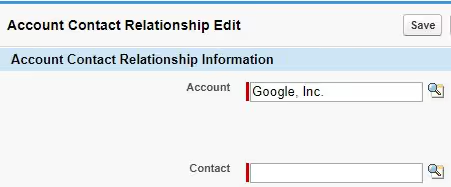
1. Click on the Accounts tab in Salesforce and select the Account you want to add a relationship to.
2. Scroll down to Related Contacts and click Add Relationship.

3. Add the required information and click Save.
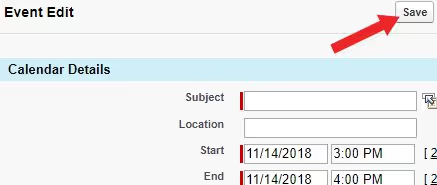
1. Select a specific lead, account, contact or opportunity you want to add an event to and scroll down to Open Activities. Click New Event.
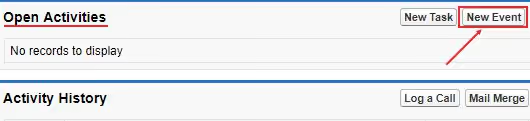
2. Fill in the required details and click Save.
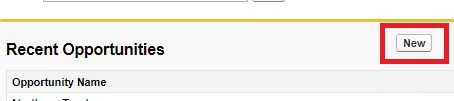
1. Click on the Opportunities tab in Salesforce.

2. Click on New.
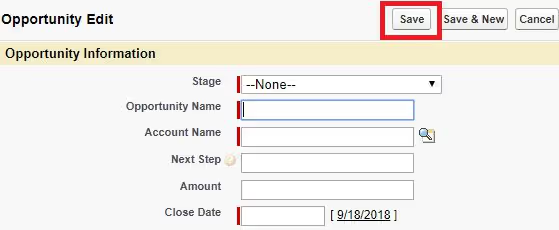
3. Fill in the required details and click Save.
The Opportunity Team must be enabled in your org by the Admin.
The Opportunity Team option will appear in the Related Lists of the specific opportunities detail page. If you do not see it here, you need to contact your admin so they can enable this option through setup.
Business Process
1. Click on the Opportunities tab in Salesforce and select the opportunity you want to add the Opportunity Team to.
2. Scroll down Opportunity Team in the Related Lists and Click Add.

3. Add a User and select a Team Role respectively and click Save.
A page layout has many related lists. You can customize which ones you see and their order.
Business Process
1. Click on your Name and click My Settings.
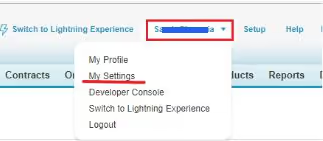
2. Click on Display and Layout and select Customize My Pages from the drop down menu.
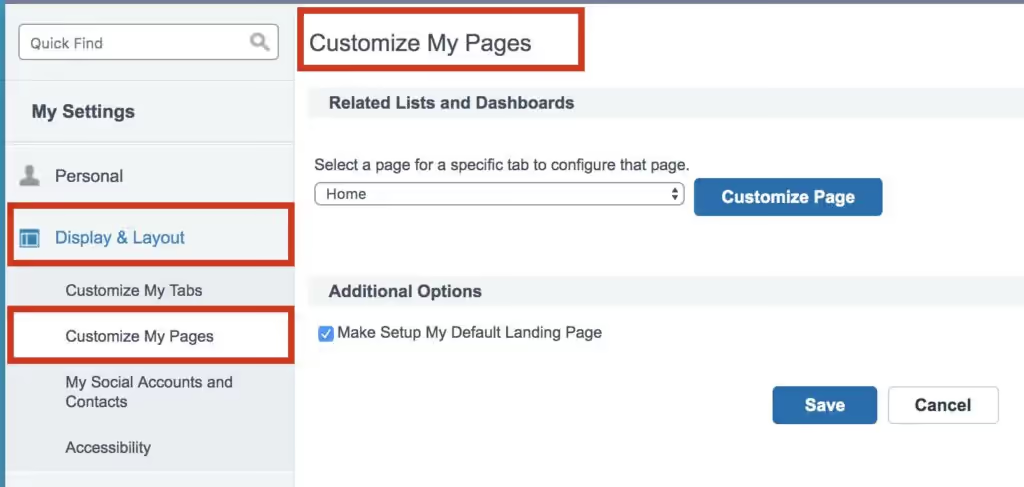
3. Now choose a page you would like to customize for example, Home, and click the Customize Page button.
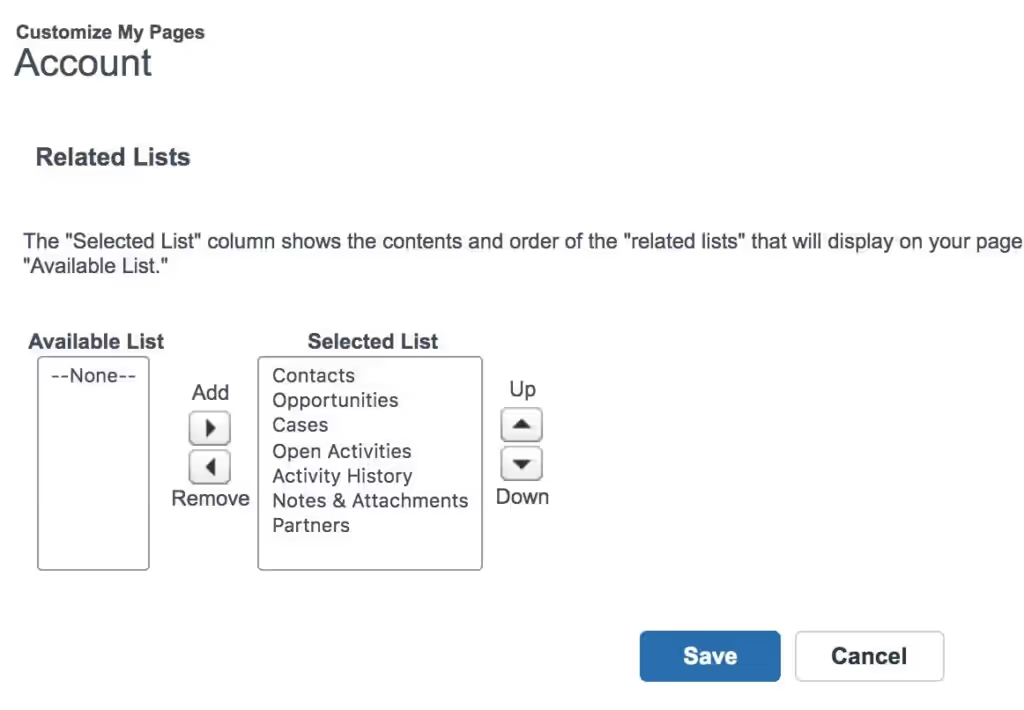
4. You can now add and remove related lists (1), and change the order of the related lists (2).
Click Save.
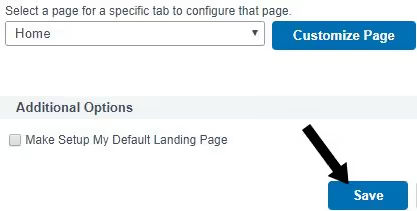
5. Once you’ve clicked save, the “Customize My Pages” page will reload. Be sure to click Save here or the settings will not update in Salesforce.
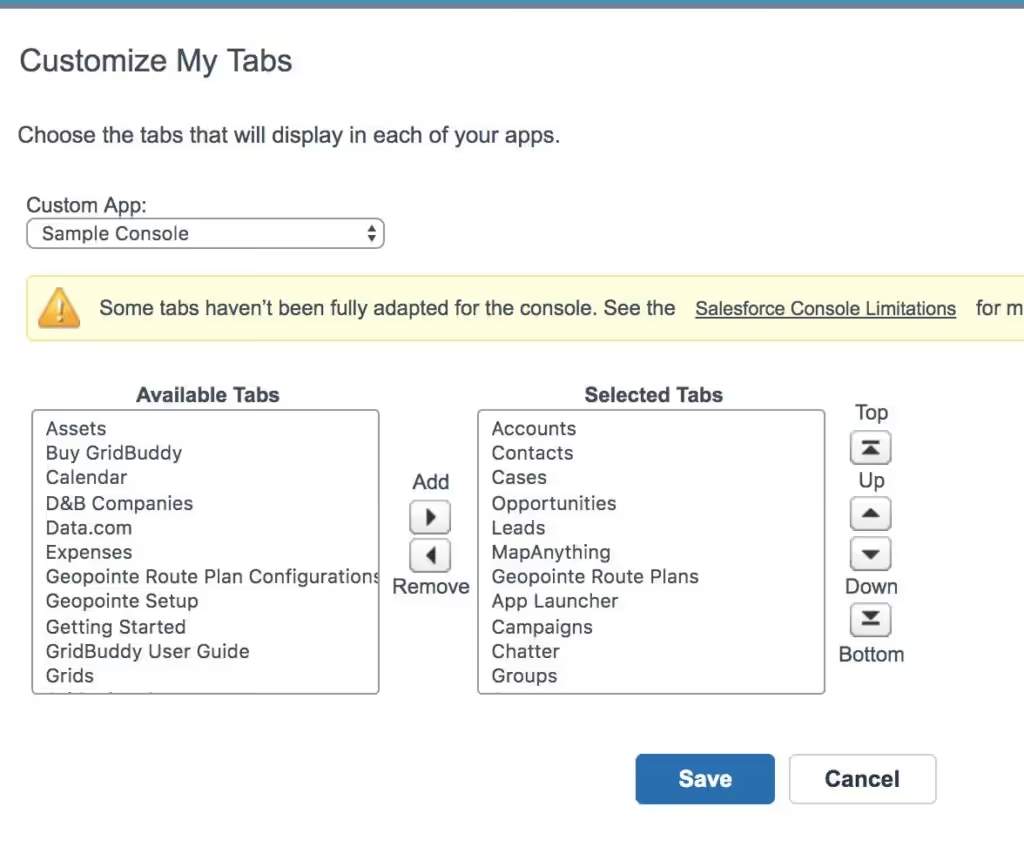
One of the easiest and most effective customizations that you can make in Salesforce is to change the tabs that appear when you log in.
Business Process
1. Click on your Name and select My Settings.
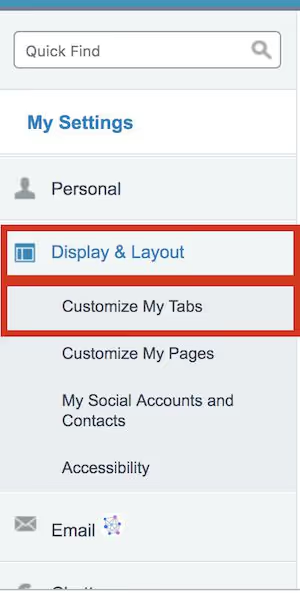
2. Click on Display and Layout and select Customize My Tabs.
3. You can now add and remove tabs (1), and change the order of the tabs you see (2).
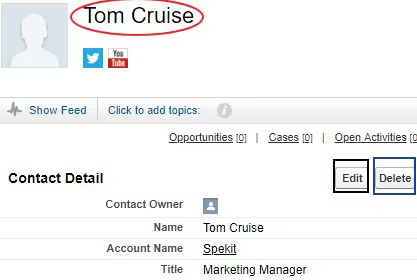
Salesforce allows you to edit or delete a Contact at any point.
Business Process
1. Click on the Contacts tab at the top of your Salesforce page and select the contact you want to edit or delete.
2. On the records detail page click Delete (a) to delete the contact OR Edit (b) to edit the contact.
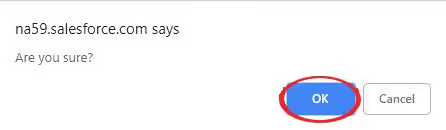
(a) When you click on delete as shown above, a pop up confirmation box will appear. To permanently delete the contact click OK or click on Cancel to go back to the contacts details page.
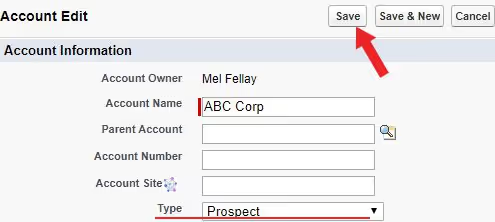
(b) To edit the contact, click on edit and update the information. Click Save.
Salesforce allows you to edit or delete an Account at any point.
Business Process
1. Click the Accounts tab in Salesforce and select the Account you want to edit or delete.
2. On the records detail page, click Delete (a) to delete the account OR click on Edit (b) to edit the account.
(a). When you click on delete, a pop up will appear asking for confirmation. Click OK to permanently delete the account or click Cancel to go back to the main page.
(b). To edit the account, click on edit as shown above and update the existing information or fill in any fields that were previously blank such as account Type. Click Save.
Salesforce allows you to edit or delete an Opportunity at any point.
Business Process
1. Click on the Opportunities tab in Salesforce and select the opportunity you want to edit or delete.
2. On the records detail page click Delete (a) to delete the opportunity OR Edit (b) to edit the opportunity.
(a) When you click on delete, a pop up confirmation box will appear. To permanently delete the opportunity click OK or click on Cancel to go back to the opportunities details page.
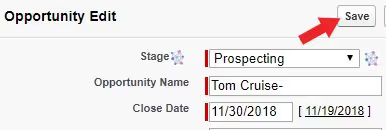
(b) To edit the Opportunity click on edit. Update the information and click Save.
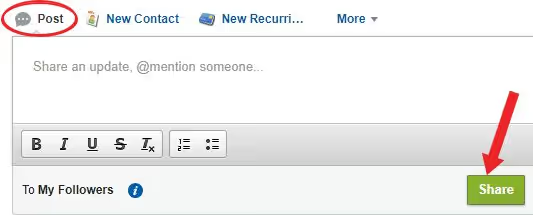
1. Click on the Chatter tab at the top of your Salesforce page.
2. On the Post tab, click into the Share an update text box to type your message.
You have access to multiple options in the Chatter publisher. With the rich text editor (1), you can add style and lists to your post. You can attach files to a post by clicking on More (2). You can mention someone in your post by typing “@name” in the text box (3).
3. Type in your text and click Share to post.