











Content Templates
nCino 101 Enablement Template | Spekit
Maximize the ROI of your nCino investment, drive accountability and process adherence, and increase data quality with reinforced training.

nCino is a software company that provides a cloud-based platform specifically designed for the financial services industry, with a primary focus on banking. The company’s platform is known for its Bank Operating System, which offers solutions for various aspects of banking operations, including commercial and retail banking, lending, treasury management, and more.
nCino’s platform is intended to help financial institutions streamline their processes, enhance customer experiences, and improve overall efficiency. Some key features of nCino’s platform include:
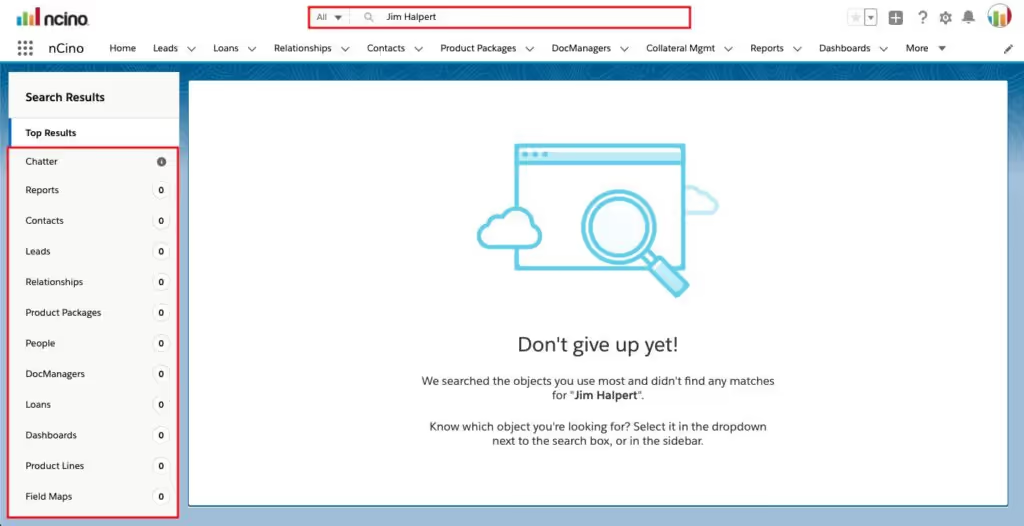
It’s always important to first use the Global Search and do not create a record (Relationship, Lead, etc.) that already exists
ALWAYS do the Global Search first before you start anything new Enter the name, company, TIN number, Social Security Number The TIN number and/or SSN is used a lot because they are unique Names can show duplicates which can be quite confusing

If the above criteria is met, you can proceed with the steps below
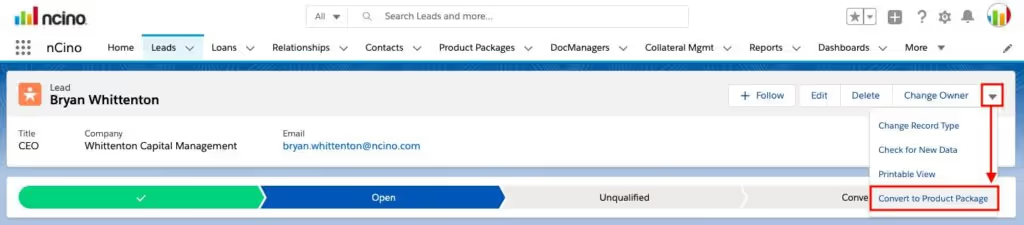
On the Lead record you wish to convert to a Product Package
1) Click ▼ to show the drop down
2) Click Convert to Product Package
Question: If I only have one loan, do I need to have a Product Package?
Answer: You must create a Product Package even if it’s for one loan
In the Product Package you:
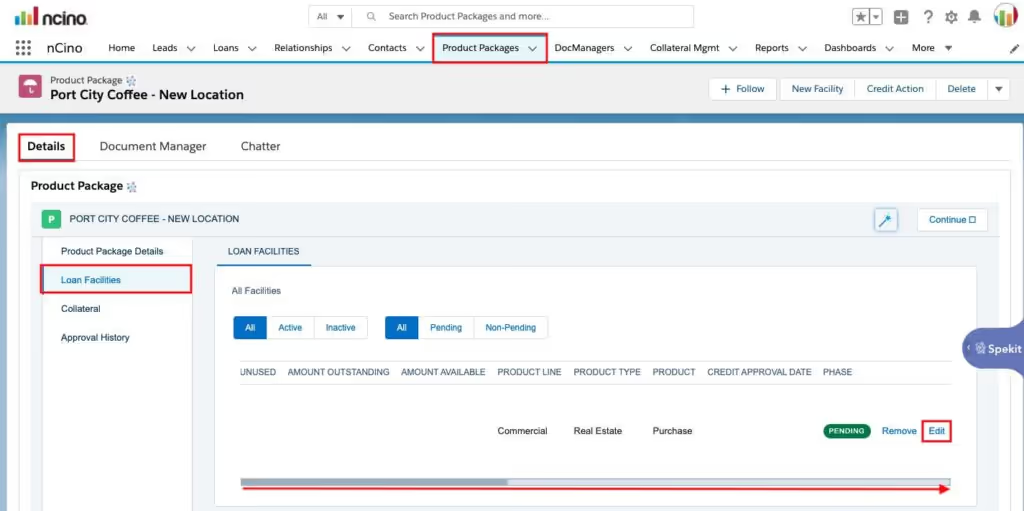
-On the Product Package record
1) Click the Details header
2) Click Loan Facilities
3) Move the scroll bar all the way to the right (scroll left on a trackpad)
4) Click Edit
-A check appears in the box if the Loan Facility is Review Ready
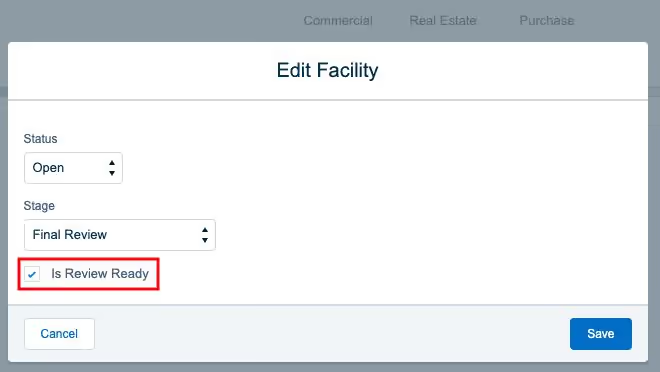
All Loans have to be in Final Review status before you can submit for approval
– From the Product Package record
You only convert once during a transaction
Then add additional loans and create the borrowing structure (add more Relationships) later – after
Convert to PP
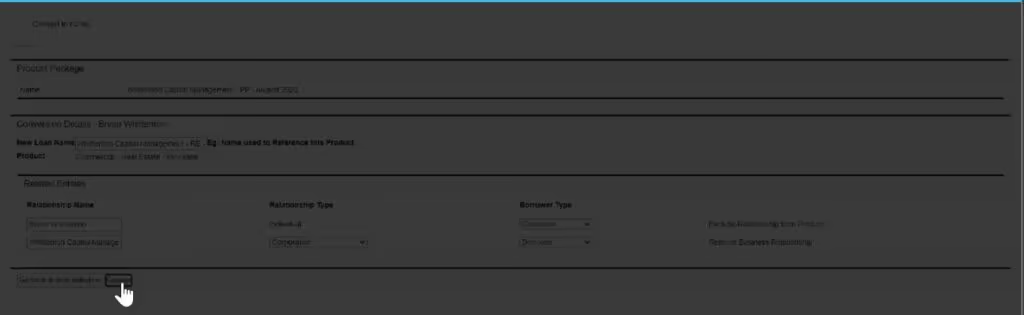
When you click the Convert button the screen will go gray while it creates
1) Click the New Facility button on the Product Package record
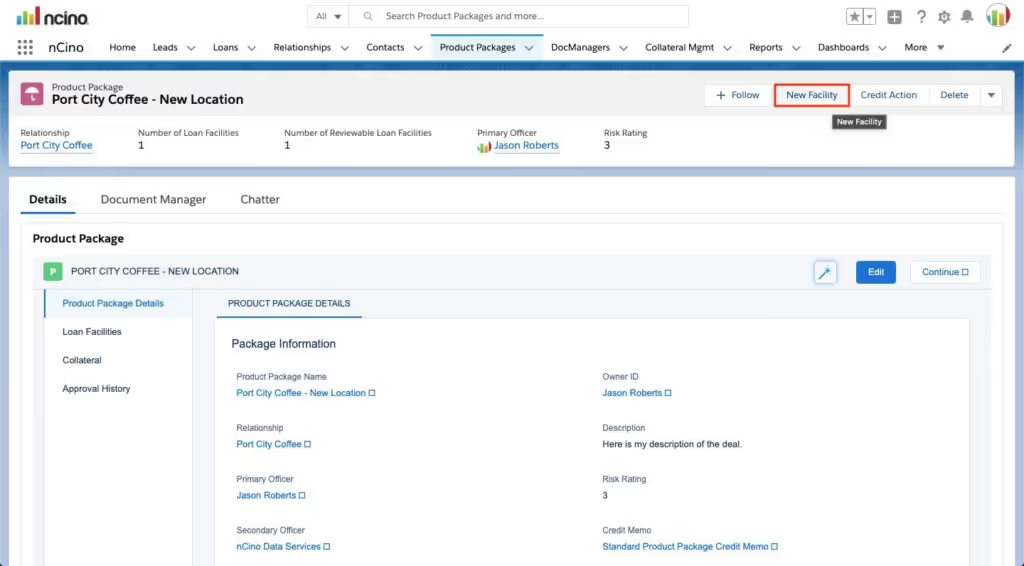
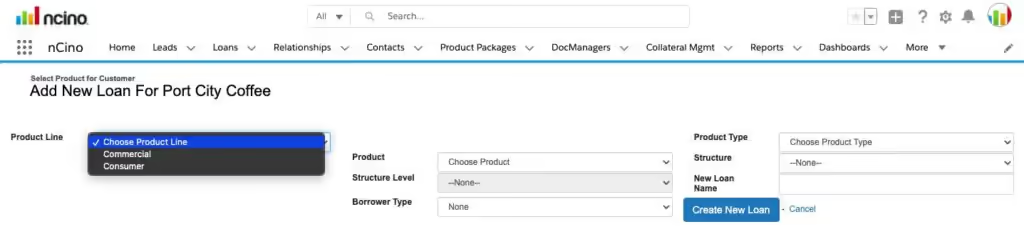
-The screen will transition to the Select Product for Customer screen
-Make the necessary selections
2) Click Create New Loan
As soon as the user converts – and has a PP record, and more facilities can be added
Best practice:
Complete “Loan 1” then use Copy Loan to get started with “Loan 2” to prevent having to duplicate any data entry that is the same across both loans
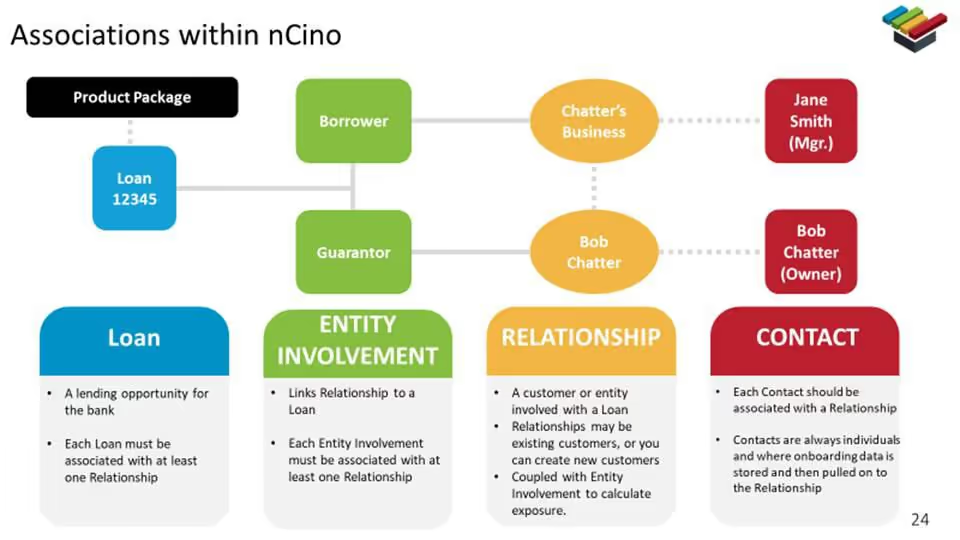
Contact Roles are used on a Relationship record to handle multiple Contacts at the same company
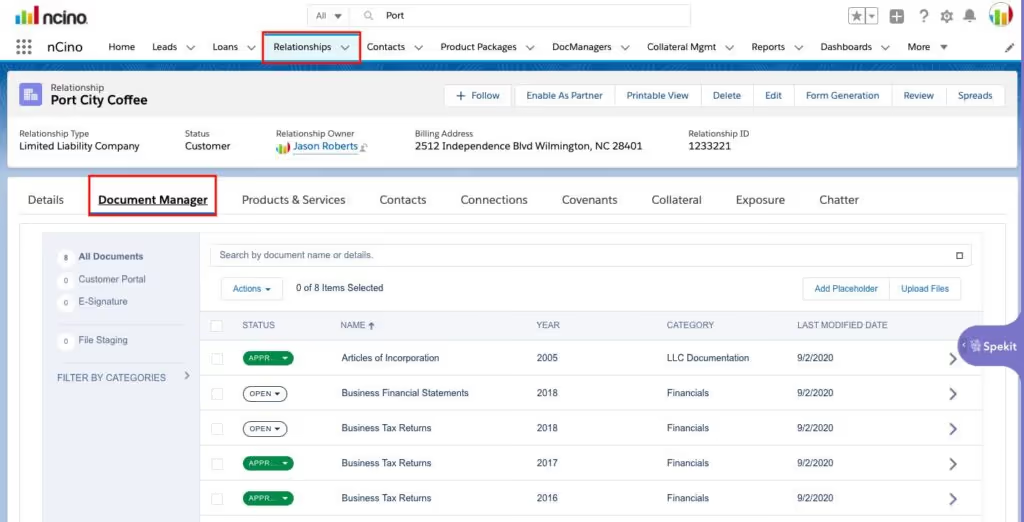
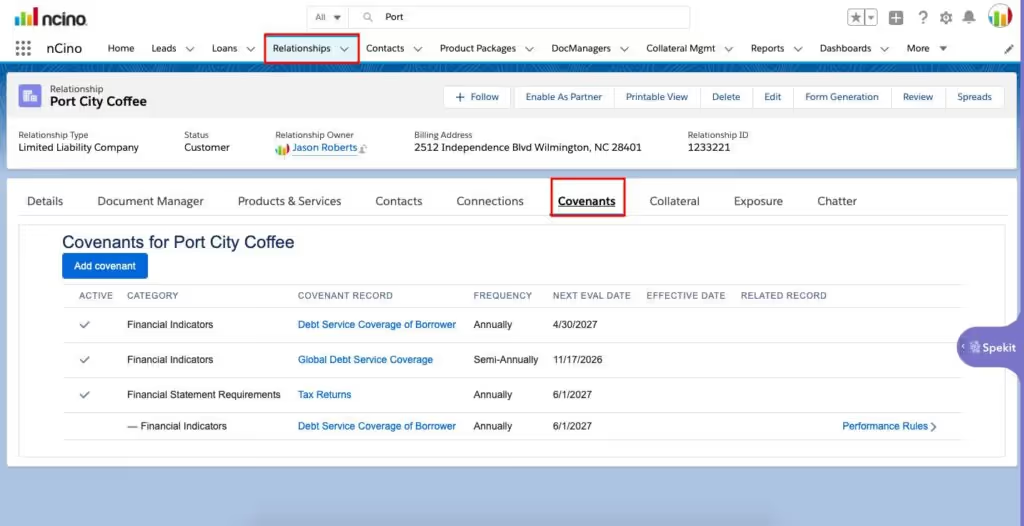
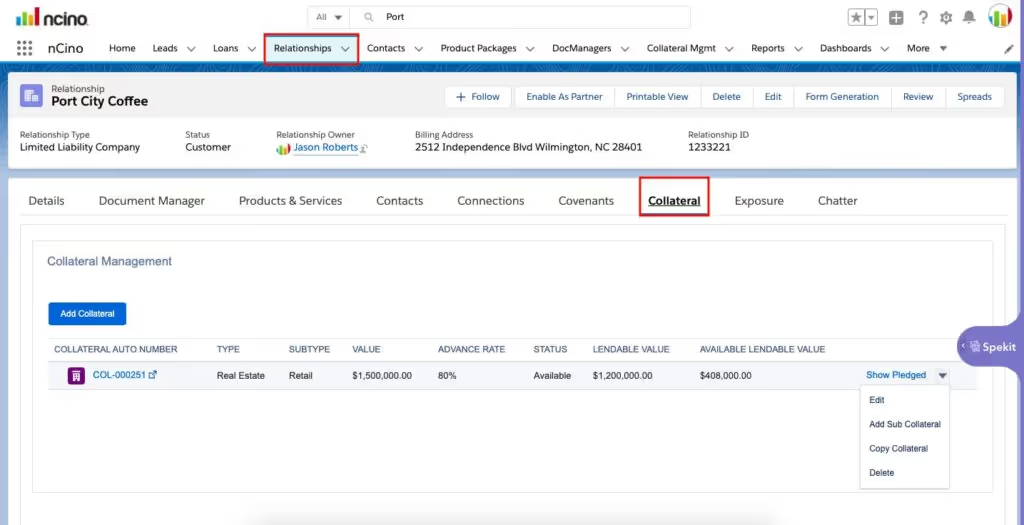
– On the Relationships record
1) Click Document Manager
2) Click Upload Files
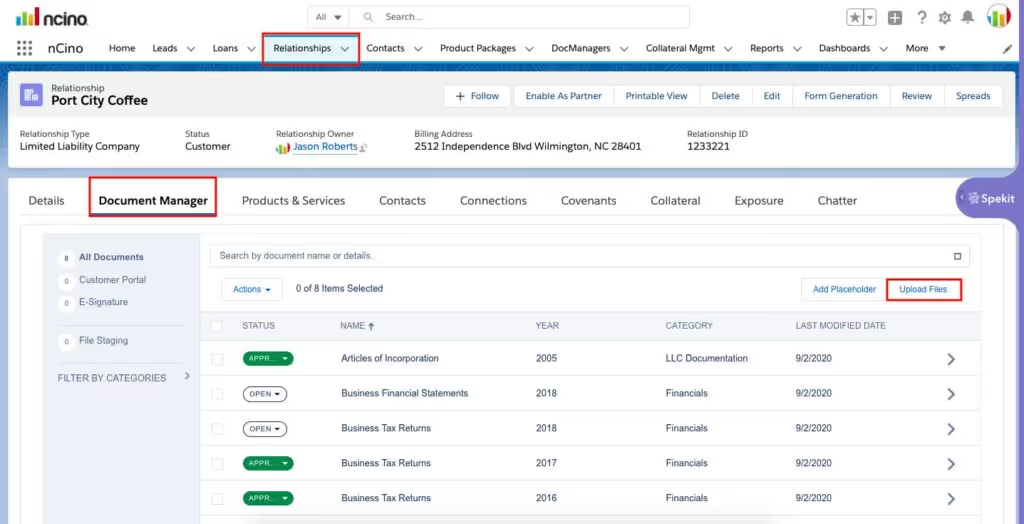
3) Locate and click on the file to upload
4) The upload process will start and the document will be in File Staging
5) Click the eye icon to view it
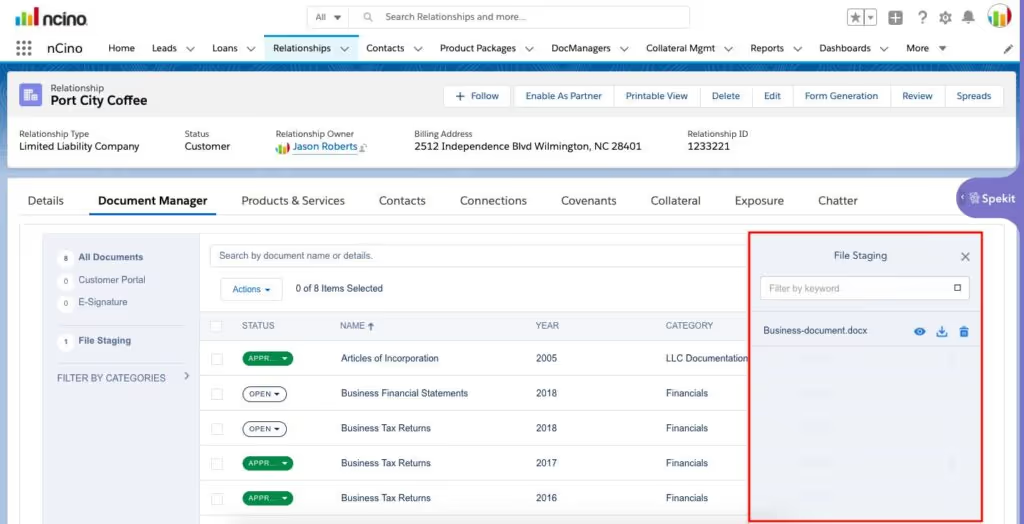
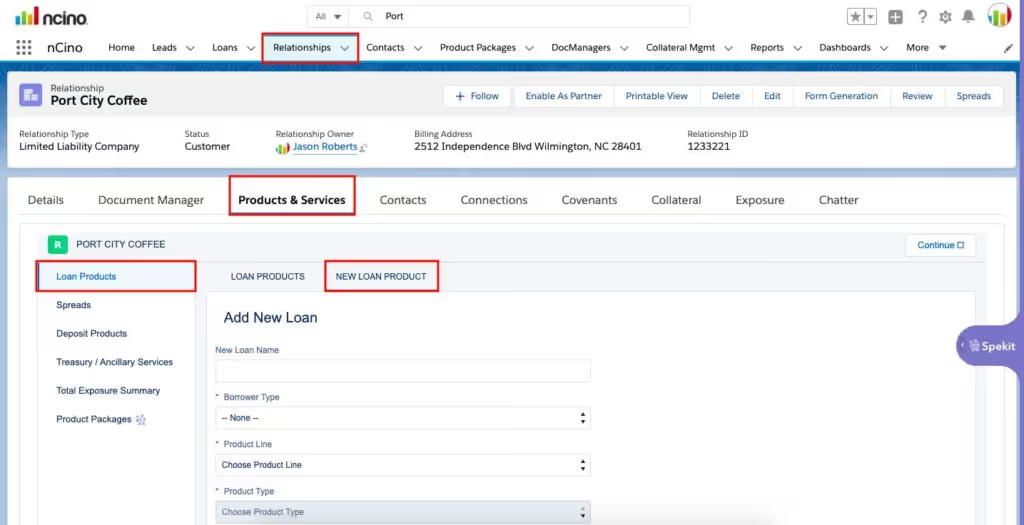
-From the Relationship record
1) Click on the Products & Services header
**For my example: I clicked on Loan Products
2) Click New Loan Product
3) Add the New Loan Name
4) Click on each picklist to select the appropriate selection for the required fields
5) Click Continue to complete the process
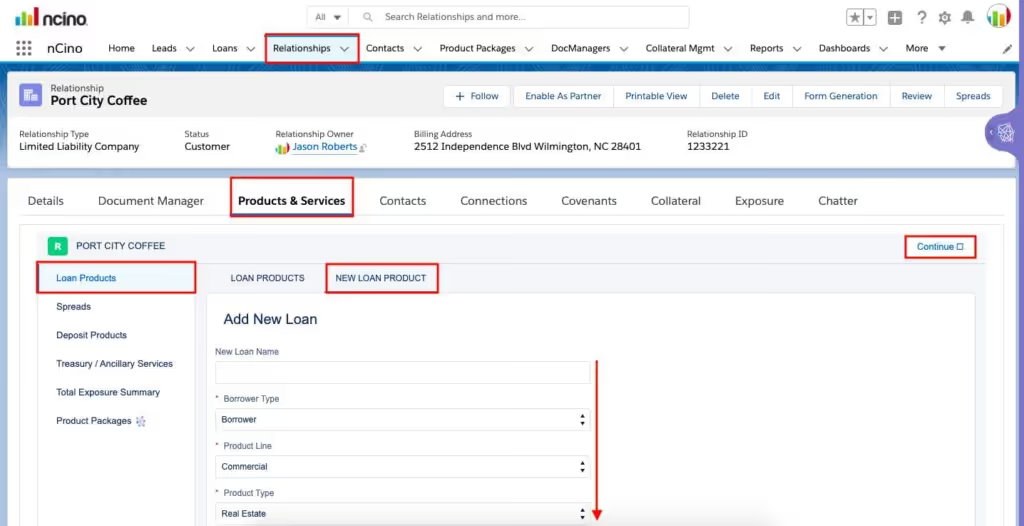
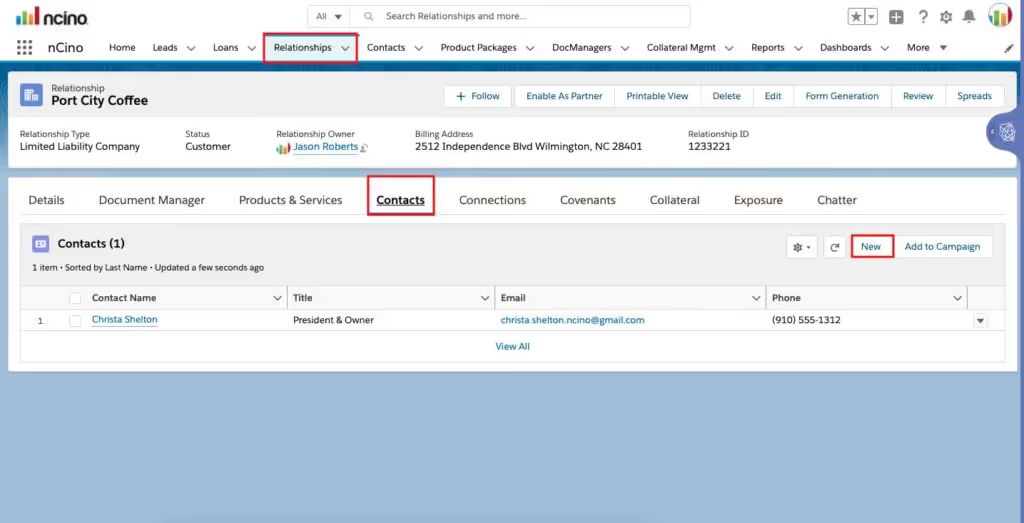
-From the Relationship record
1) Click Contacts
2) Click New
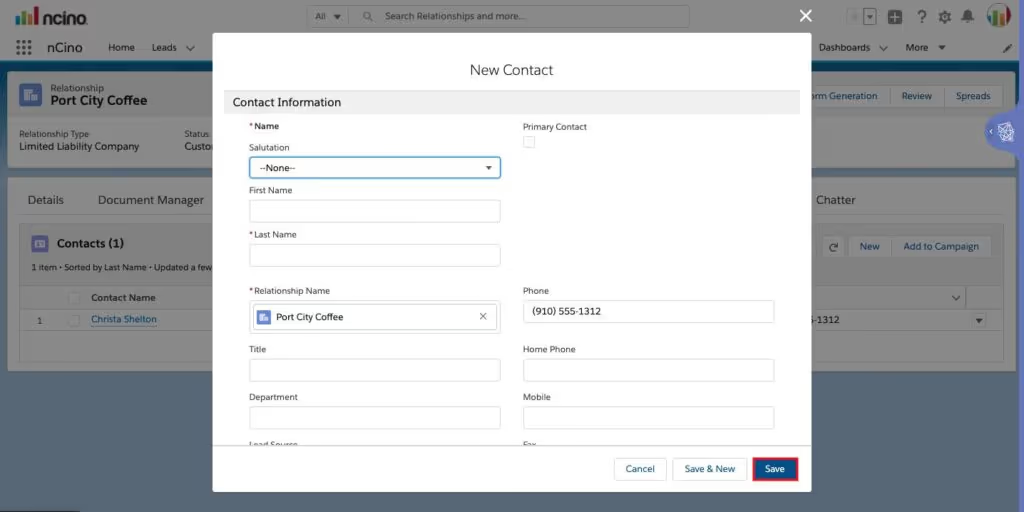
-Fill out the required details
-Click Save
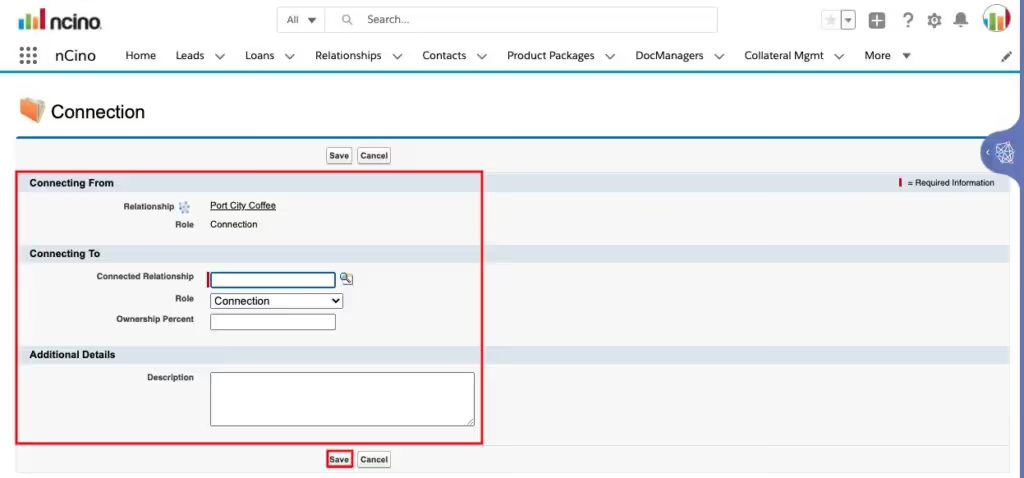
1) Click to select a Relationship record
2) Click Connections
3) Click New
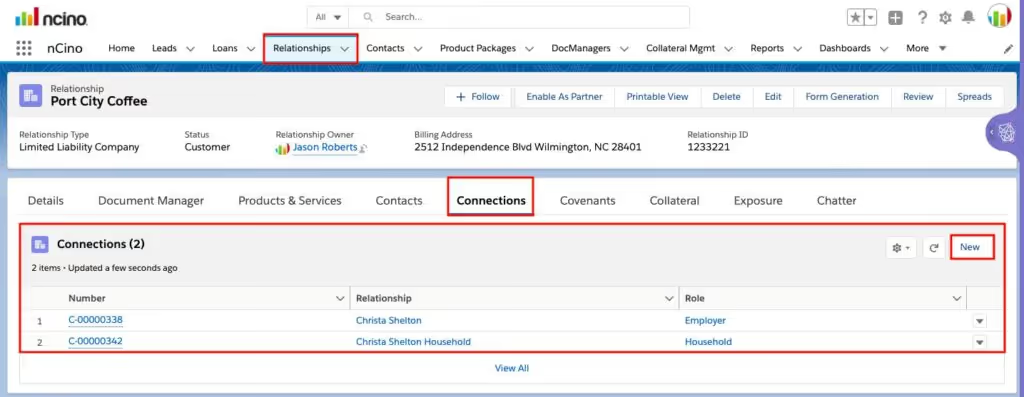
4) Enter the details
5) Click Save
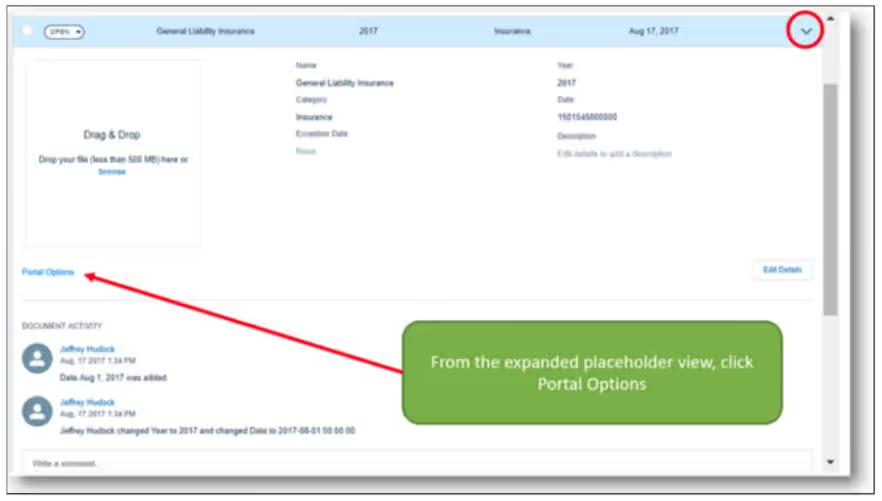
When you want a user to upload a document through Customer Portal, you have to enable that placeholder.
To enable a single placeholder:
1) Navigate to that placeholder in Document Manager and expand it using the carat to the right of the placeholder.
2) From the expanded placeholder view, click Portal Options.
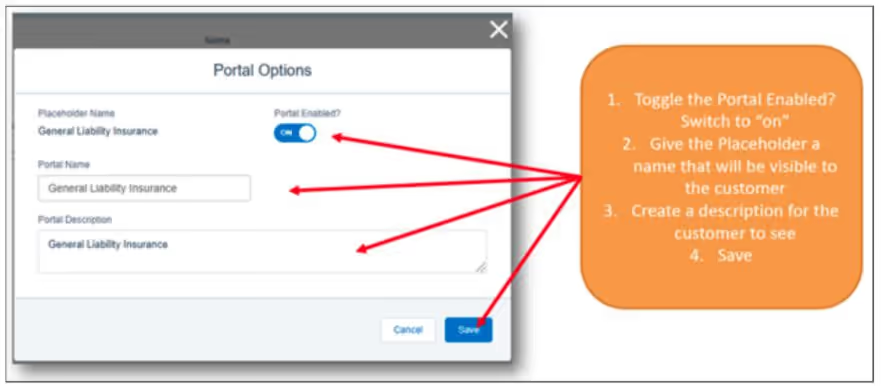
3) Toggle the “Portal Enabled?” switch to “on”
4) Give the Placeholder a name (this is visible to the customer)
5) Create a description for the customer to see when they review the To-Do List within the portal
6) Click Save
This placeholder, including the Portal Name and Portal Description shows in the To-Do list for this Customer Portal
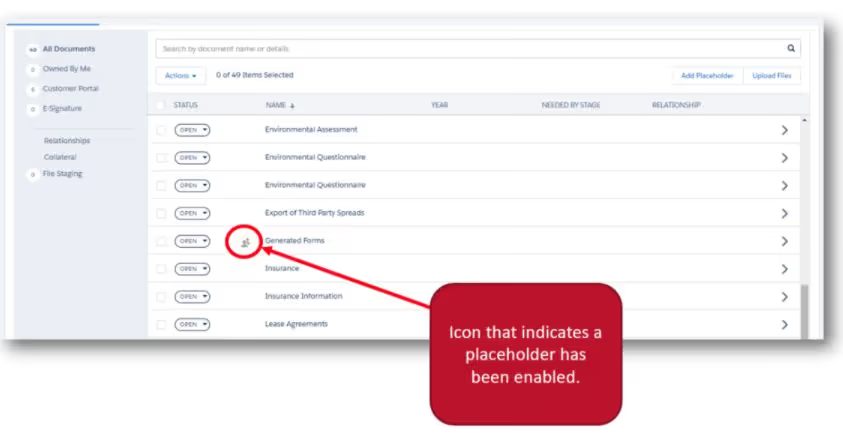
An indicator will display next to the placeholder name in Document Manager to indicate that placeholder has been portal enabled
To enable multiple documents at the same time, you can bulk request documents.
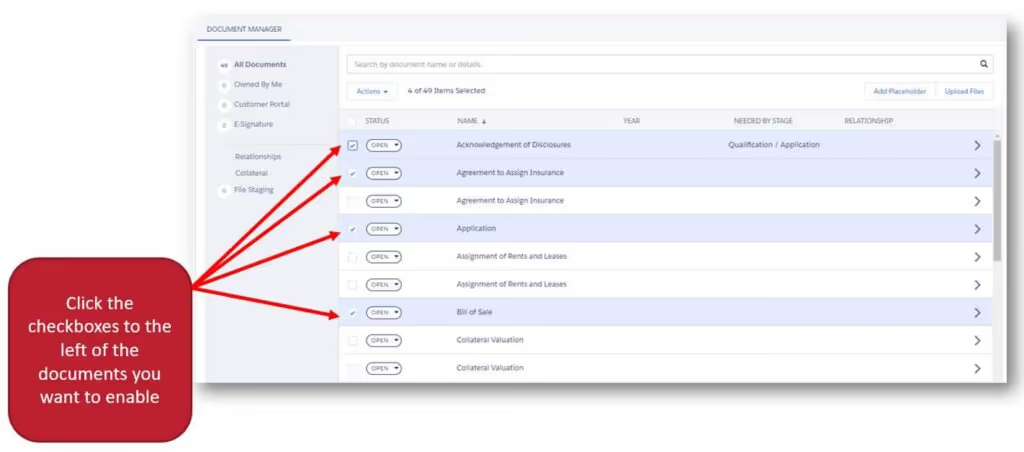
1) From Document Manager, click the checkboxes to the left of the documents you want to enable
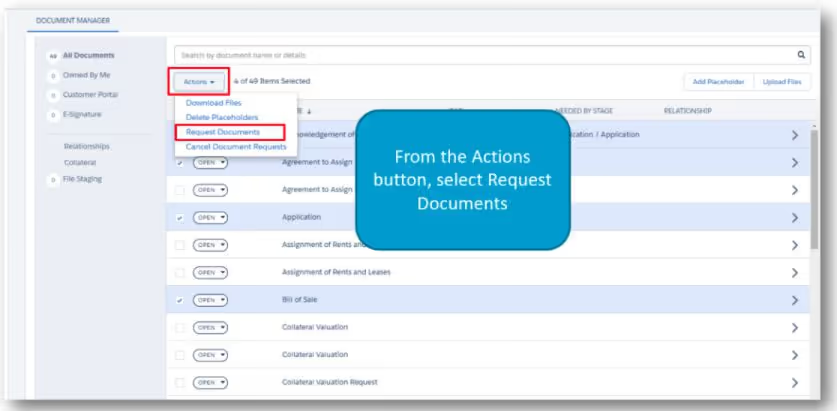
2) Click Actions and select Request Documents
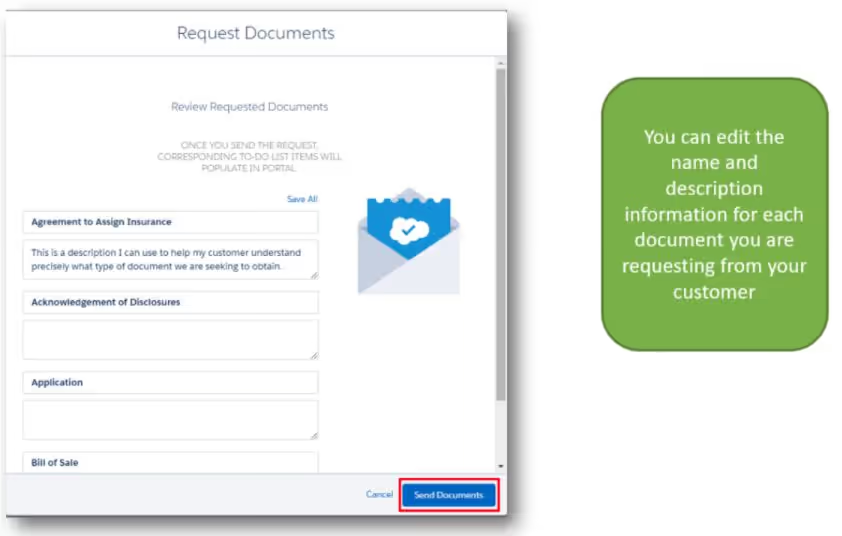
3) Edit the name and description labels
This is what your customer will see on their dashboard
4) Click Send Documents
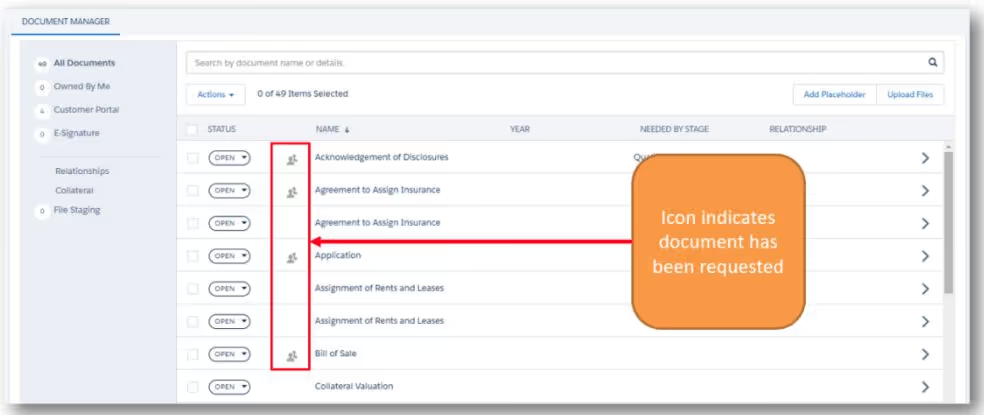
5) An icon will display next to the placeholder name in Document Manager to indicate which documents have been Portal enabled
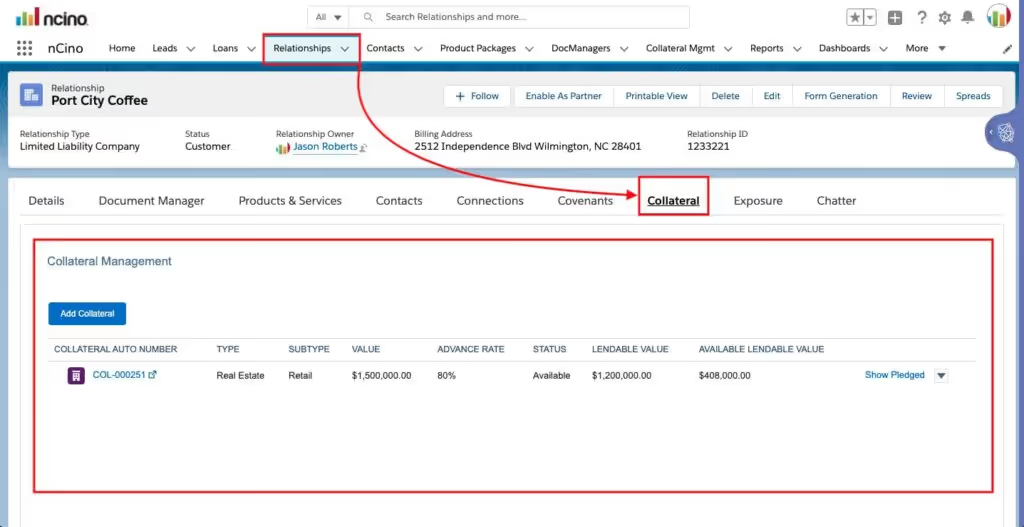
The Collateral on the Relationship record was set in place when the Loan was originated
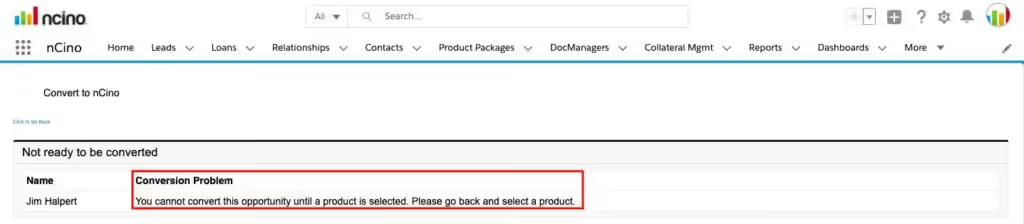
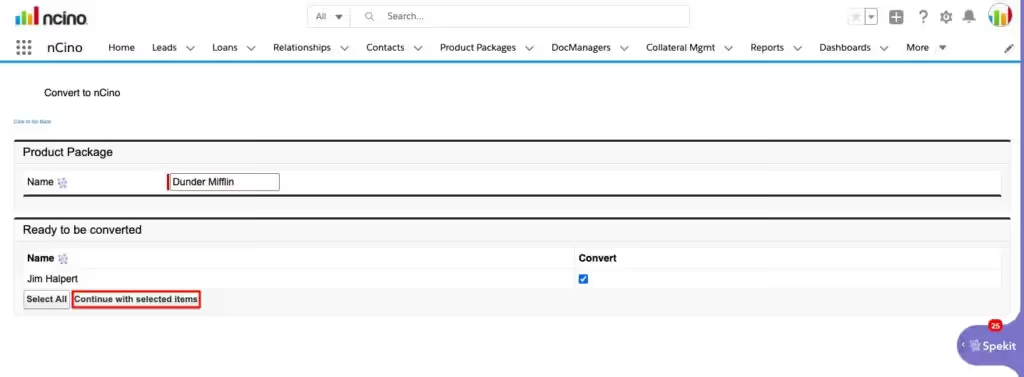
When you click Convert to Product Package, on the Lead record
-The screen will transition and a screen similar to the one below will appear
When you click the Continue with selected items button the following happens:
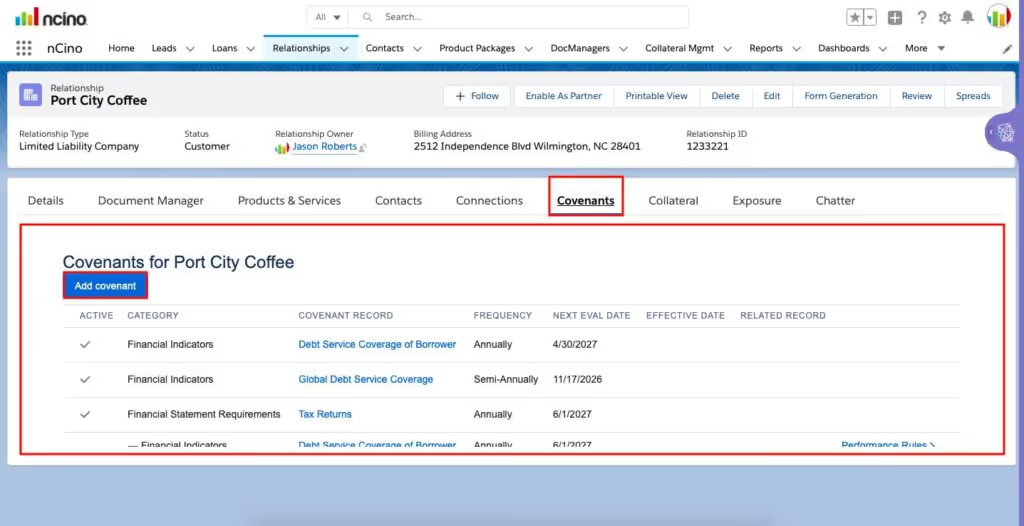
Covenants on the Relationship record were set in place when the Loan was originated
Question: What to do if I need to enter multiple loans?
Answer: Enter the biggest deal first
Question: What to do if I am talking to multiple people at the same company?
Answer: Enter the main point of contact first. Later add more contacts to the Product Package record as Contact Roles after the Lead has been converted
On the Relationship record, the Document Manager has options available for:
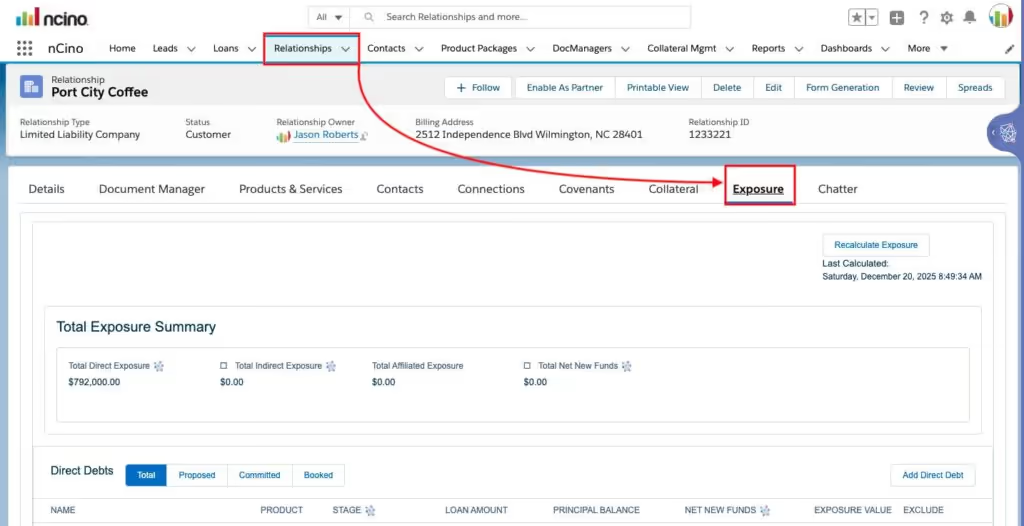
Exposure on the Relationship record is read-only
You can view a Total Exposure Summary which includes Total, Proposed, Committed, and Booked for: