



.svg)
.svg)



Content Templates
Salesforce Lightning List Views
A template covering Salesforce Lightning list views, including inline editing, mass editing, and Kanban boards, for reps working directly in Salesforce.
You can edit some fields directly from a List View without having to navigate to the record itself in Salesforce Lightning.
If the field is editable from the List view, you will see a ✏️ icon

1. Click the ✏️ icon.
2. Edit field values.
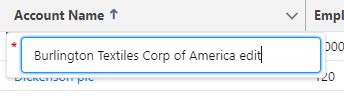
3. See edits in yellow.
4. Click Save.
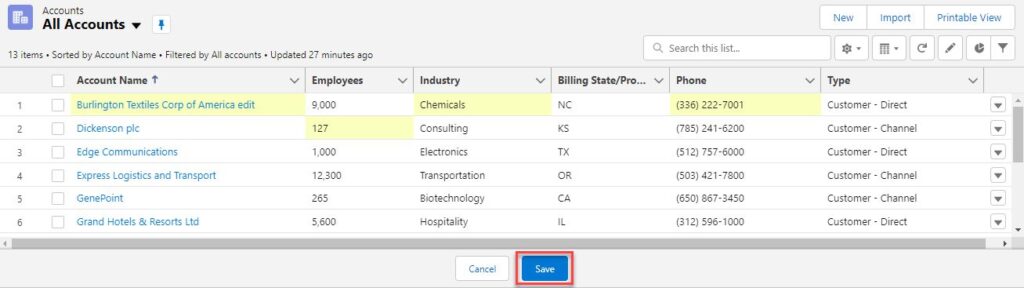
You can update multiple record fields to the same value at once.
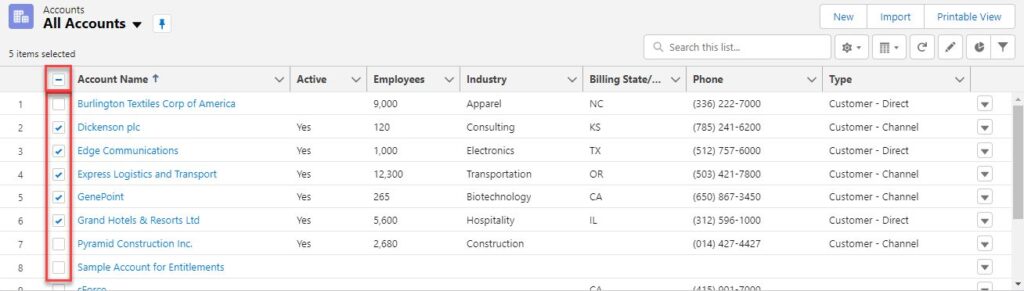
2. Update the field value.
3. Check the Update # selected items box.
4. Click Apply.
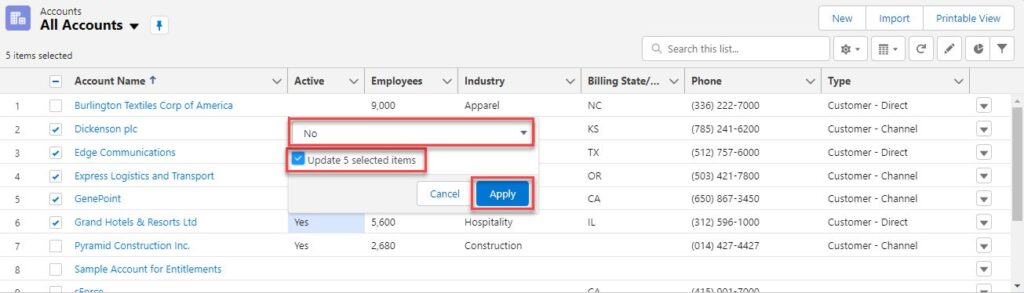
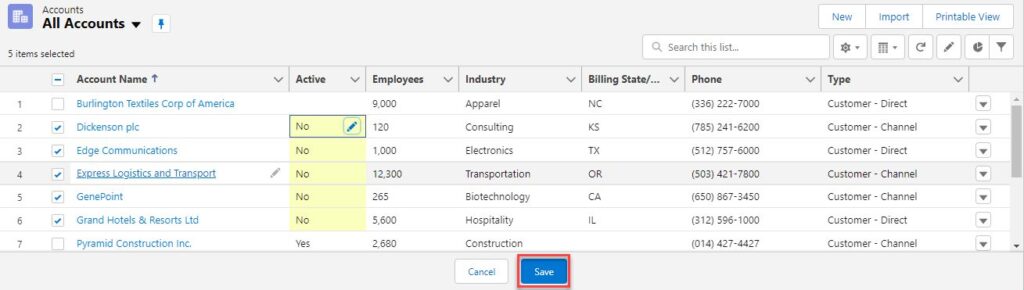
5. See edits in yellow.
4. Click Save.
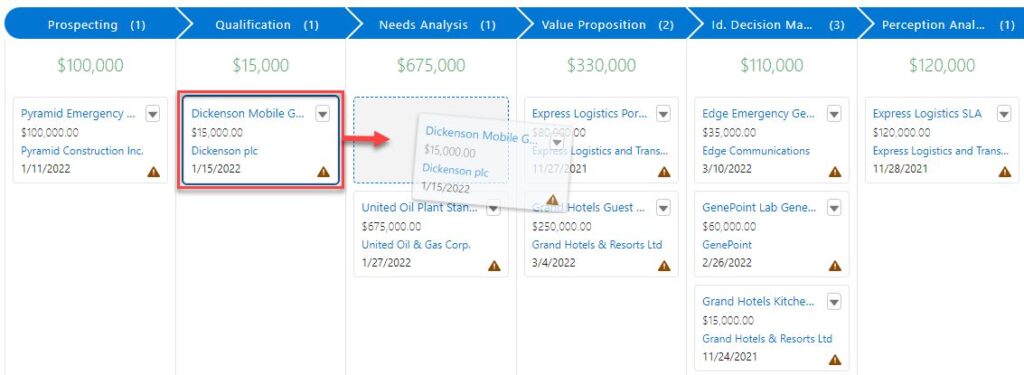
You can view a List View as a Kanban board or a visual way of seeing a grouping of a lot of work at once

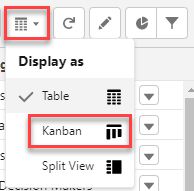
1. Click the Display As icon.
2. Click Kanban.
3. The List View will refresh.
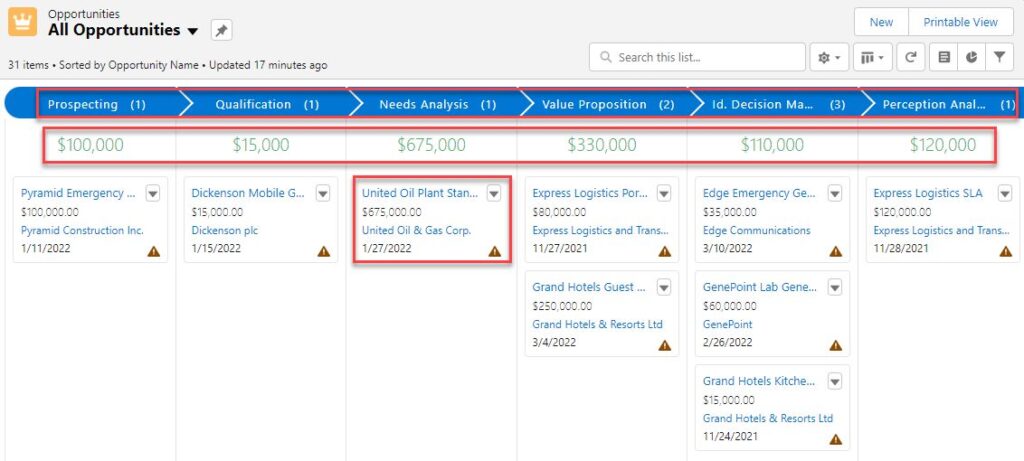
4. Drag-and-Drop records to update the grouped field.
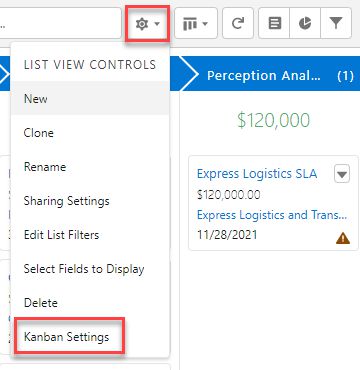
1. Click the List View Controls ⚙️ icon.
2. Click Kanban Settings.
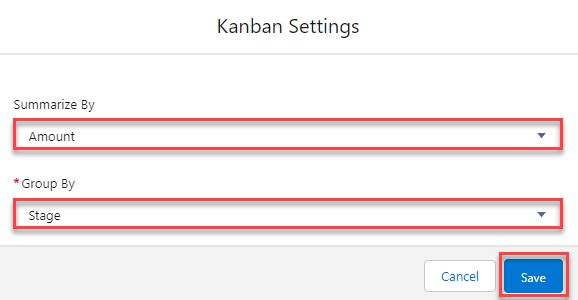
3. Update the Kanban display:
3a. Summarize By
4. Click Save.

1. New – Create a Record.
2. Import
3. Printable View – View the List View in a printer-friendly format and print it.

1. List View Controls –
2. Display As
3. Refresh – Refresh the data displayed.
4. Edit List
5. Show Charts
6. Show Filters
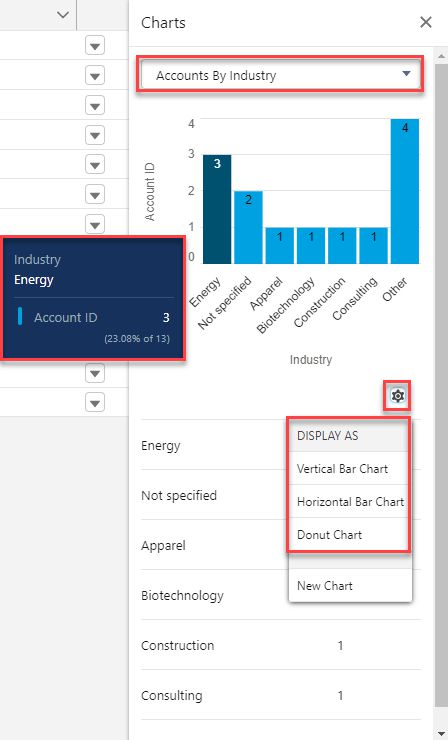
Add a chart to a List View to make it more visual!

Viewing the Chart
1. Chart Name is at the top. Click the Down Arrow to choose another Chart.
2. Hover over a part of the chart values to see specifics.
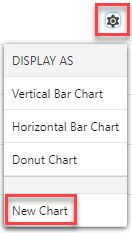
3. Click the Gear to change the chart type or create a new Chart.
1. Click the Gear.
2. Click New Chart.
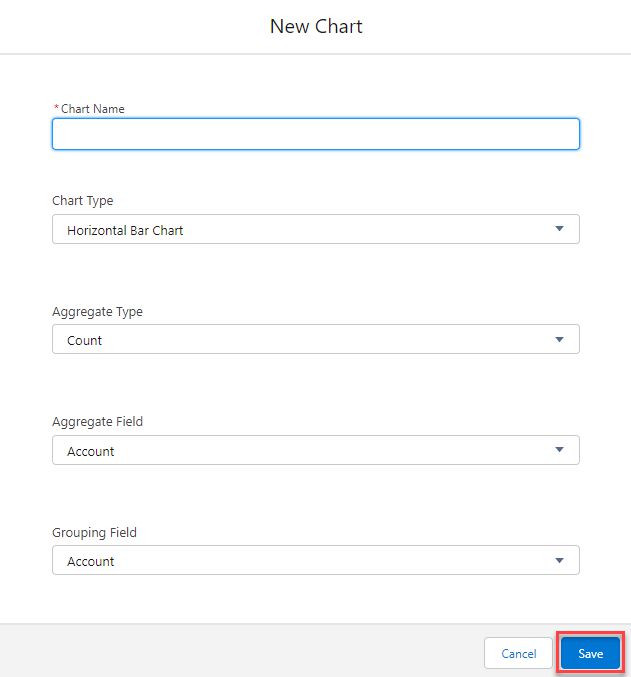
3. Enter the Chart Name.
4. Chart Type
5. Aggregate Type
6. Aggregate Field
7. Grouping Field
8. Click Save.
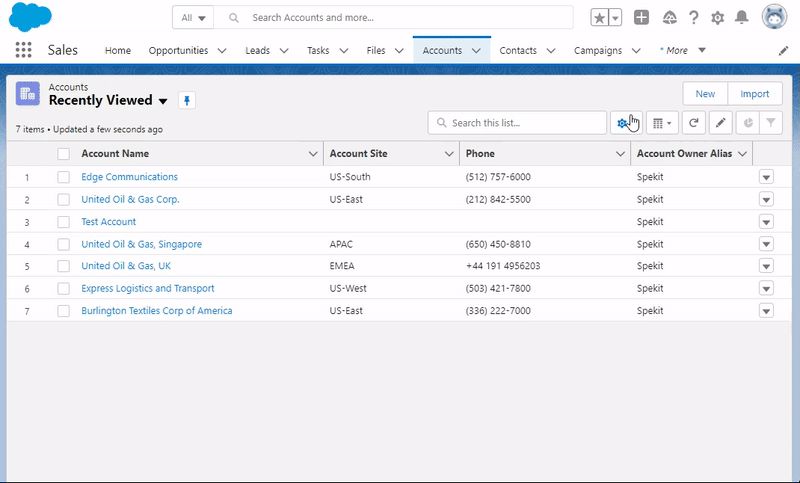

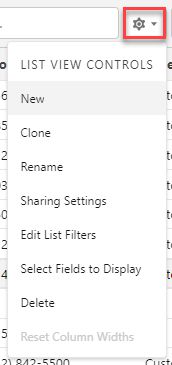
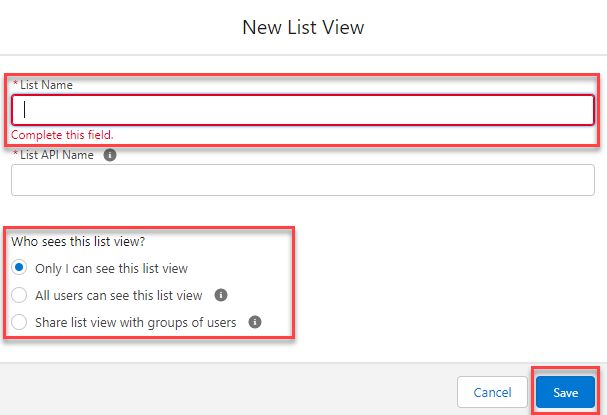
1. New
1a. Enter a List Name.
2a. Select who can view the List.
3a. Click Save.
2. Clone
If you need a new List View that is only a minor change from an existing one, Clone it and make the minor edit instead of creating it new.
Looks just like creating a New List View above.
3. Rename
4. Sharing Settings
Update who can view a List.
5. Edit List Filters
Same action as clicking the List View Filter icon.
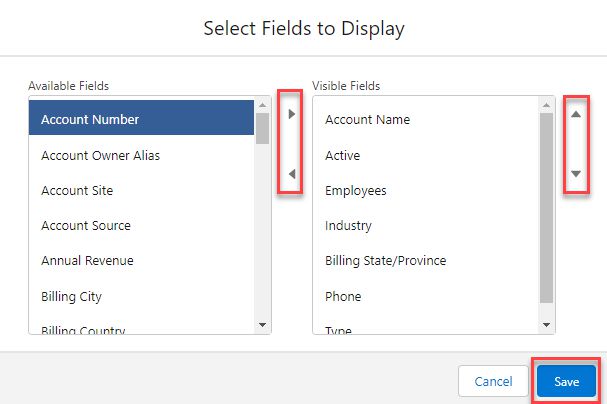
6. Select Fields to Display
6a. Add and Remove Fields
6b. Re-order the Fields
6c. Click Save.
7. Delete
8. Reset Column Widths
If a column is made shorter or larger, this button will reset it to the default width.
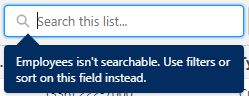
If the List View has many results, instead of adding a filter, you can Search the List View to limit your results.
Change column width by hovering over the area between them and dragging and dropping to make the column shorter or longer.

Click a column header field name to sort ascending or descending. You can see what field is sorted which way by the arrow to the right of the column name and if it’s pointing up or down.

Add filters to a List View to make your lists easier to work through!
See records that match certain criteria instead of all records for that Object.
Using filters is beneficial to allow you to see only the records you need to work.

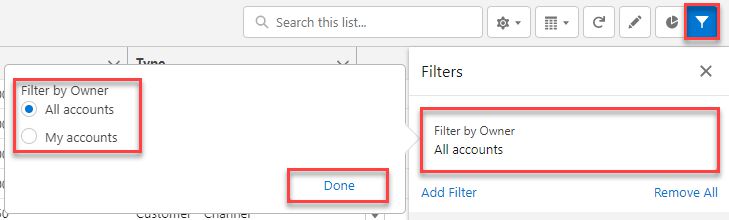
1. Filter by Owner
2. Click Done.
Add More Filters
1. Click Add Filter
2. Select the Field
3. Select the Operator
4. Enter the Value
5. Click Done
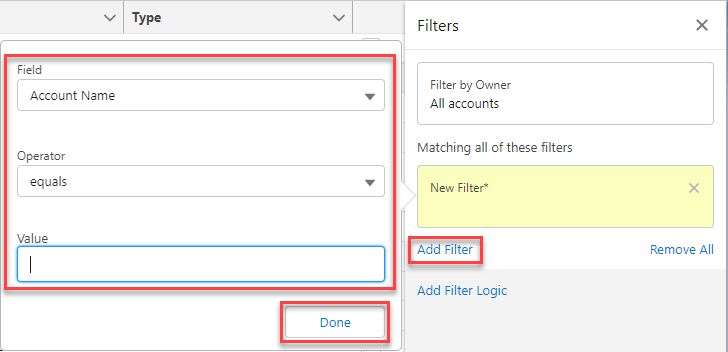
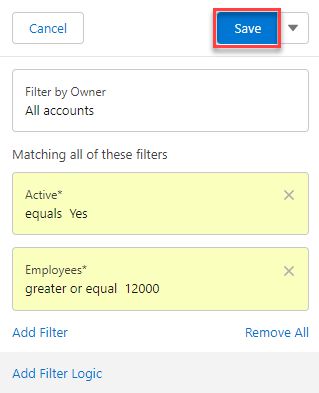
6. Click Add Filter for as many fields as you want filter criteria for.
7. Click Save
Add Filter Logic
Filter Logic allows you to be more specific in drilling down your results.
1. Click Add Filter Logic
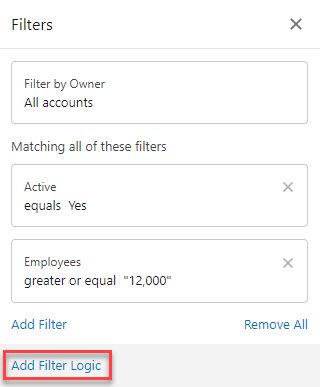
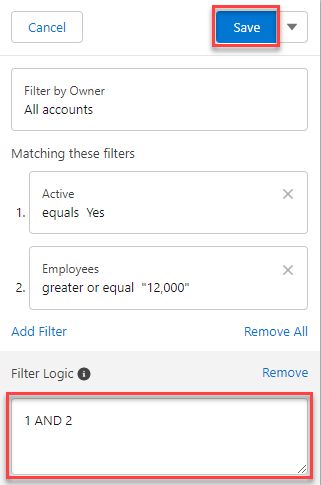
2. By default, Filter Logic is only ANDs, meaning all filters need to be true for the record to appear.
3. You can change it to be 1 OR 2 so that if either result is true for the record it will appear.
4. If you have even more filters you can add more detailed logic including parenthesis.
5. Click Save.
List Views can be similar to Reports, but only allow you to view information from one Object at a time.
By default, List Views are in the Table format seen below. They can be accessed by clicking the Objects Tab.
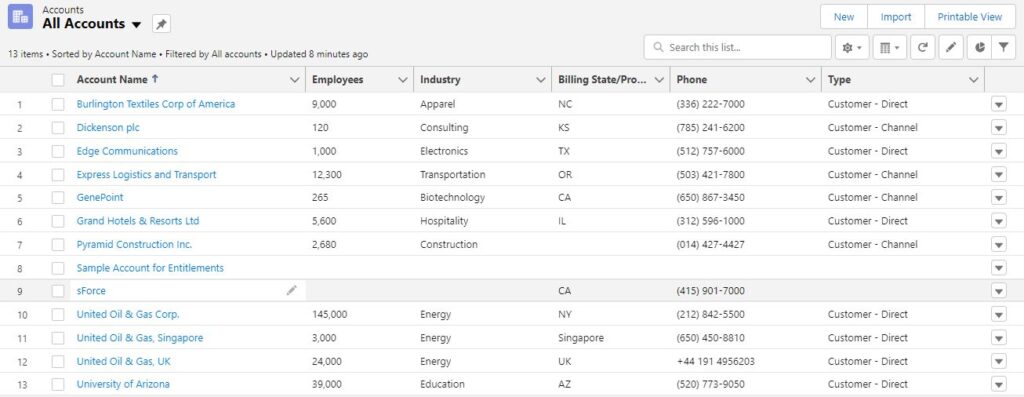
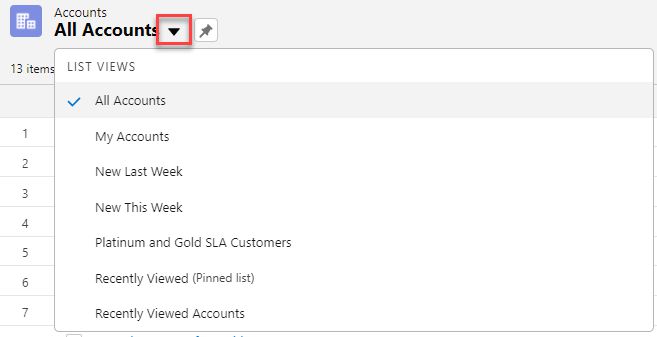
2. Click the 🔽 icon
3. Click the List View Name to load it.
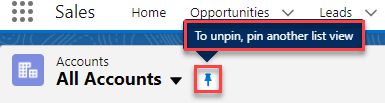
To make your default List View different from “Recently Viewed”, pin a different one.
1. Load the List View you want to be your default.
2. Click the 📌 icon.
You can see a List View in a Split View in Salesforce Lightning
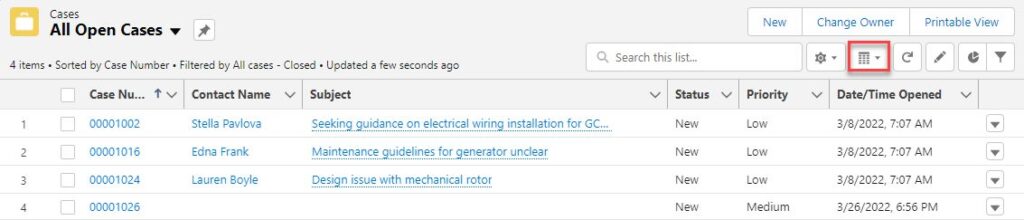
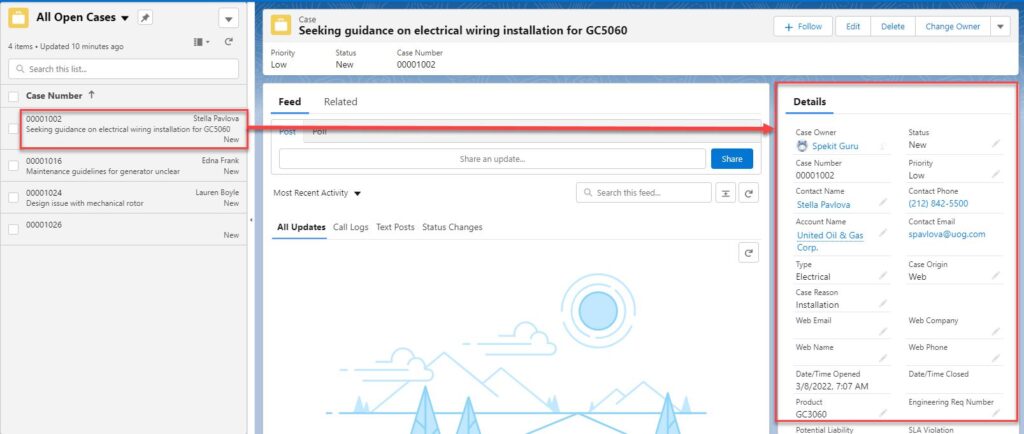
1. Click the Display As icon
2. Click Split View
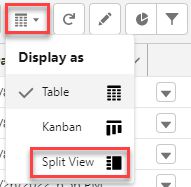
3. The List View will refresh